Can I Clean Headliner With Drill Attachment: Safe Guide
Yes, you can clean a car headliner with a drill attachment, but only if you use a soft upholstery brush, low drill speed, light pressure, and very little cleaner. A drill can save time on large areas, yet it can also pull the fabric loose, create fuzz, leave rings, or damage the foam backing.
This advice applies to vehicles in the United States, including cars, trucks, SUVs, and vans. Always check the vehicle owner’s manual first. Headliners vary by make and model, and some use delicate fabric, suede-like material, vinyl, or a thin foam-backed cloth.
The safest method is often hand cleaning. Use a drill only for light surface dirt and only after testing an unseen spot.

What Is a Car Headliner?
A car headliner is the material attached to the inside roof of a vehicle. Most headliners have three layers:
- A visible cloth, knit, or suede-like surface
- A thin foam layer
- A rigid roof board or backing panel
This construction explains why headliners need special care. The cloth is not usually a loose carpet that you can soak and scrub. The foam and adhesive underneath can weaken when exposed to water, heat, harsh chemicals, or heavy pressure.
A damaged headliner may show:
- Sagging fabric
- Loose edges
- Wrinkles
- Dark water rings
- Fuzzy or worn areas
- Exposed foam
- Separation from the backing board
The main cleaning goal is to remove dirt from the surface without pushing liquid into the foam or disturbing the adhesive.

Which Drill Attachment Is Safe for a Headliner?
Use a soft, round upholstery brush made for fabric or interior cleaning. The bristles should bend easily when pressed against your hand.
Avoid attachments designed for hard surfaces or heavy scrubbing.
| Drill attachment | Headliner use | Reason |
|---|---|---|
| Soft nylon upholstery brush | Usually suitable | Gentle agitation for light dirt |
| Soft detailing brush | Suitable for small spots | Better control than a large brush |
| Medium-stiff carpet brush | Use with caution | May roughen or pull the fabric |
| Stiff nylon brush | Not recommended | Can damage fibers and foam |
| Wire brush | Never use | Cuts and tears headliner material |
| Melamine foam pad | Usually avoid | Removes surface material through abrasion |
| Polishing pad | Not recommended | Can heat, flatten, or mark the fabric |
The brush should be clean before use. A dirty brush can spread grease and grit across the roof.
Choose a drill with a variable-speed trigger. A cordless drill is easier to control than a high-speed impact driver. Do not use hammer mode.

What You Need Before You Start
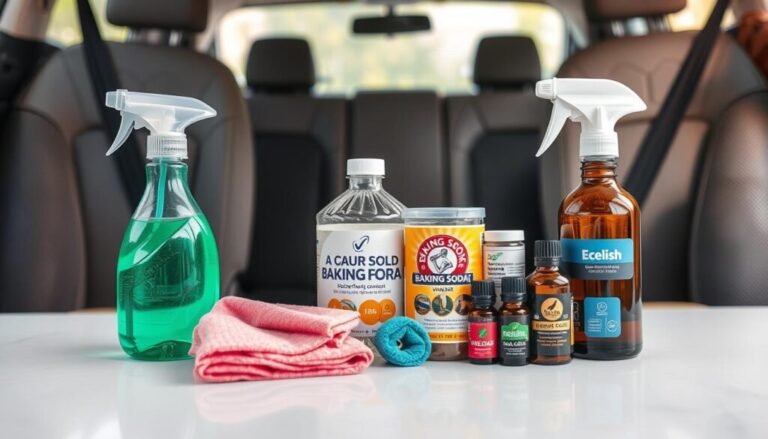
Gather the following items:
- A vacuum with a soft brush nozzle
- A soft upholstery drill brush
- A variable-speed drill
- An interior-safe fabric cleaner
- Two or three clean microfiber towels
- A small spray bottle
- Painter’s tape
- A soft hand brush
- Safety glasses
- Disposable gloves
Use a cleaner that is labeled for automotive fabric or upholstery. Avoid bleach, strong solvents, household degreasers, and products that leave a greasy film.
If you use a ready-to-use cleaner, do not assume more product means better cleaning. Extra moisture is the main risk when cleaning a headliner.
Before spraying, protect:
- Seats
- Dashboard
- Windows
- Door panels
- Plastic trim
- Seat belts
- Electronics near the roof
Cover nearby areas with towels or plastic sheeting. Keep liquid away from overhead lights, microphones, sunroof switches, and wiring.

How to Clean a Headliner With a Drill Attachment
Follow this process for light dirt, dust, smoke film, and small stains.
1. Read the Owner’s Manual
Look for interior-care instructions in the vehicle manual. Some manufacturers warn against soaking, steam cleaning, harsh chemicals, or removing the headliner.
If the manual says to use a dry cloth or approved cleaner only, follow that direction.
2. Test an Unseen Area
Choose a hidden area near the rear edge of the headliner or behind a trim section. Apply a small amount of cleaner to a towel, not directly to the roof.
Blot the test area. Let it dry fully.
Check for:
- Color transfer
- Fading
- Swelling
- Water marks
- Loose fabric
- A change in texture
- A strong chemical smell
Do not continue if the material changes.
3. Vacuum the Headliner
Use a soft brush attachment and low suction. Move the vacuum gently across the surface.
Do not press the vacuum nozzle hard against the cloth. Strong suction can pull at weak fabric or lift a loose section.
Vacuuming first removes grit that could act like sandpaper during brushing.
4. Prepare the Drill Brush
Attach the soft brush firmly to the drill. Set the drill to its lowest speed.
Before touching the headliner, run the brush in the air. Confirm that:
- The brush spins evenly
- No bristles are bent or sharp
- The attachment does not wobble
- The drill has no hammer setting enabled
A brush that wobbles can make a deep circular mark.
5. Apply Cleaner to a Towel
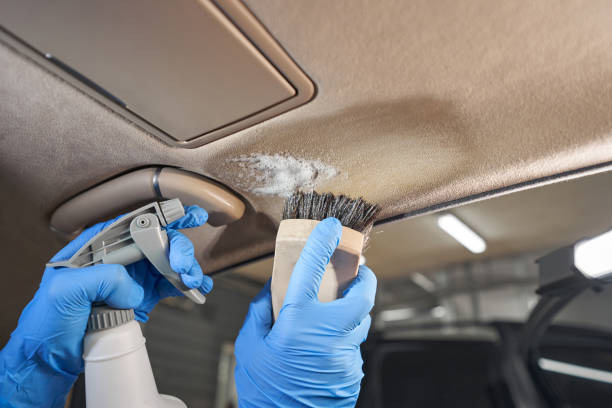
Spray a small amount of cleaner onto a microfiber towel. Do not soak the headliner.
The towel should feel damp, not wet. Direct spraying can force liquid into seams, edges, clips, and the foam backing.
For a small stain, use a folded corner of the towel. Work in a small area first.
6. Run the Brush at Low Speed
Place the brush lightly against the fabric. Let the bristles touch the surface without pushing into it.
Use short, straight passes. Avoid holding the brush in one place. Do not make tight circles unless the brush manufacturer specifically recommends that motion for delicate upholstery.
Work in sections of about 12 by 12 inches. Overlap each section slightly so the cleaned areas blend together.
The brush should do the work. If you need force, stop and switch to a hand brush.
7. Blot the Area
After light agitation, press a clean microfiber towel against the area. Lift the towel rather than rubbing hard.
Blotting removes loosened dirt and extra moisture. Turn the towel often so you do not spread the soil back onto the fabric.
Repeat once if needed. Several light passes are safer than one wet, aggressive pass.
8. Let the Headliner Dry
Open the doors and allow air to move through the vehicle. Use the vehicle’s fan only if the manual permits it and keep the heat moderate.
Do not use a heat gun or place a high-heat dryer close to the headliner. Heat can soften adhesive and increase the risk of sagging.
The headliner should be fully dry before you judge the result. Damp fabric can look darker than the surrounding area.

How Fast Should the Drill Spin?
Use the lowest speed that allows the brush to move smoothly. The exact revolutions per minute vary by drill, battery, and trigger position, so a fixed speed is less useful than observing the fabric.
Stop if you see:
- Fibers lifting
- Fabric twisting
- A shiny patch
- Color change
- Brush marks
- Foam appearing through the cloth
- The fabric moving away from the backing
A slow drill is not automatically safe if you press too hard. Pressure, moisture, brush stiffness, and contact time all affect the result.
A useful rule is simple: if the brush visibly pushes, stretches, or distorts the fabric, reduce pressure or stop using the drill.

Drill Brush Versus Hand Cleaning
Hand cleaning gives you more control. A drill brush can cover a larger roof faster, but it increases the chance of damage.
| Method | Best for | Main advantage | Main risk |
|---|---|---|---|
| Microfiber towel | Dust and light marks | Lowest abrasion | May not lift embedded dirt |
| Soft hand brush | Small stains | Good control | Takes more time |
| Low-speed drill brush | Broad, light soil | Faster agitation | Can roughen fabric |
| Steam cleaner | Usually not ideal | Strong cleaning power | Heat and moisture can weaken adhesive |
| Carpet extractor | Often unsuitable | Removes deep soil | Too much water for many headliners |
| Professional interior cleaning | Severe stains or damage | Proper tools and skill | Higher cost |
For an older vehicle with a loose or sagging roof liner, avoid a drill. A hand-cleaning method is safer, and a professional may need to repair the headliner before cleaning.
How to Remove Common Headliner Stains
Different stains need different treatment. Do not use the same harsh cleaner for every mark.
Dust and Light Dirt
Vacuum first. Then use a slightly damp microfiber towel or soft brush. This usually requires little or no drill use.
Fingerprints and Grease
Use a small amount of automotive upholstery cleaner on a towel. Blot the area, then use a clean damp towel to remove residue.
Do not flood the spot. Grease can spread if you scrub outward from the center.
Smoke Film
Smoke residue may cover much of the headliner. Clean small sections with a fabric-safe cleaner and replace dirty towels often.
If the smell remains, the odor may also be in the seats, carpet, vents, and cabin filter. Cleaning only the roof may not solve the full odor problem.
Food or Drink
Remove solid material first with a plastic spoon or soft edge. Blot liquid instead of rubbing it deeper into the fabric.
Sugar-based drinks may leave a sticky film. A small amount of clean water on a towel can help remove residue, but keep moisture minimal.
Water Marks
Water rings can be difficult to remove because the original spill may have spread through the foam. Treating only the center can create a larger ring.
Clean the full affected section with even, light passes. If the mark returns after drying, the backing or adhesive may be affected.
Ink, Paint, or Dye
Do not scrub aggressively. Strong solvents can dissolve the adhesive, discolor the cloth, or spread the stain.
A professional detailer is the safer choice for permanent dye, ink, oil, or chemical stains.

When You Should Not Use a Drill on the Headliner
Do not use a drill brush when the headliner is already damaged. Mechanical agitation can turn a small defect into a full sagging panel.
Avoid drill cleaning if:
- The fabric is loose
- The roof liner is sagging
- You can see foam
- The material is torn
- Seams are separating
- The backing board is cracked
- The vehicle has a fragile vintage interior
- The headliner has suede, Alcantara-like, or specialty material
- The stain came from a strong chemical
- The roof has water damage
- The vehicle has exposed roof electronics
You should also avoid the drill if you cannot control its speed. A high-speed drill can create heat and friction quickly.
For a loose headliner, cleaning is not the first repair. The fabric may need to be removed, the old foam replaced, and the board re-covered.

Common Mistakes That Damage Headliners
Using Too Much Water
A wet headliner can develop rings, sag, odors, or adhesive failure. Use a damp towel rather than spraying the roof.
Starting at High Speed
High speed can roughen fibers in seconds. Start slowly and increase only if the fabric remains stable.
Scrubbing in Tight Circles
Circular scrubbing can create a visible swirl pattern. Use short, gentle strokes and keep the brush moving.
Using a Carpet Brush
Some carpet brushes are too stiff for headliner cloth. A tool that works on floor carpet may damage the thin fabric overhead.
Cleaning Only the Stain
A small cleaned circle may stand out against the rest of the roof. For a noticeable mark, blend the surrounding area with light, even cleaning.
Skipping the Test Spot
A cleaner may be safe for seats but unsafe for a headliner. Always test an unseen area first.
Applying Heat
Heat can soften the adhesive that bonds the fabric to the backing board. Use airflow, not intense heat.
Rubbing With a Dirty Towel
A dirty towel can redeposit grease and grit. Use clean towel sections as soon as the cloth picks up soil.
What to Do If the Headliner Gets Wet
If the headliner becomes more than lightly damp, stop cleaning and remove the source of moisture. Blot gently with dry towels.
Keep the vehicle ventilated. Do not press the fabric upward or pull it down while it is wet.
Watch for these signs after drying:
- Sagging
- Wrinkles
- Loose corners
- New water rings
- A musty odor
- Fabric separating from the board
If the fabric starts to sag, stop trying to flatten it with glue or more brushing. Spray adhesive used through the fabric can create hard spots and stains. A headliner repair shop can determine whether the panel needs partial repair or full replacement.

Is a Drill Attachment Better Than a Dedicated Upholstery Tool?
Not always. A drill brush is useful because many people already own a variable-speed drill. It can provide controlled agitation when paired with a soft brush.
A dedicated upholstery tool may offer better control, but the tool alone does not prevent damage. The cleaner, brush softness, pressure, and amount of moisture matter more than the power source.
For one small stain, a hand brush is usually the better choice. For broad, lightly soiled fabric that is firmly attached, a low-speed drill brush may save time.
The best method depends on the headliner’s condition:
- Firm and lightly dirty: Soft drill brush may be suitable
- Firm but delicate: Hand brush is safer
- Loose or sagging: Repair before cleaning
- Heavily stained: Consider professional cleaning
- Unknown material: Follow the manual and test first

Quick Decision Guide
Use this guide before starting:
-
Is the fabric firmly attached?
If no, do not use a drill. -
Is the brush soft enough for delicate fabric?
If no, do not use it. -
Can the drill run slowly without hammer action?
If no, use a hand brush. -
Is the cleaner made for automotive upholstery?
If no, choose another product. -
Can you test a hidden area first?
If no, delay the job. -
Can you keep moisture very low?
If no, do not clean the headliner with that method.
If all answers are yes, clean a small test section before treating the full roof.

FAQs About Cleaning a Headliner With a Drill Attachment
Can I use a drill brush on any car headliner?
No. Use it only on a firm, fabric-covered headliner that passes a hidden-area test. Avoid it on loose, damaged, suede-like, or highly delicate material.
Can I spray cleaner directly on the headliner?
It is safer to spray the cleaner onto a microfiber towel. Direct spraying can soak the foam, stain the roof, or reach electrical parts.
What drill speed should I use?
Use the lowest practical speed and light pressure. The correct setting depends on the drill and brush. Stop if the fabric lifts, twists, heats up, or changes texture.
Can I use a steam cleaner on a headliner?
Steam is risky because heat and moisture can weaken the adhesive and cause sagging. Use it only when the vehicle maker or a qualified professional specifically approves the method.
Why did a water ring appear after cleaning?
Water rings often result from uneven moisture or dirt moving through the fabric and foam. Clean larger sections evenly with less liquid, or have a professional assess the stain.
Should I clean the whole headliner instead of one spot?
For a visible stain, cleaning the entire panel or a natural section can prevent a bright clean spot from standing out. Keep the process light and even.
Final Recommendation
You can clean a car headliner with a drill attachment, but use the drill as a gentle agitator, not a power scrubber. Choose a soft upholstery brush, keep the speed low, apply cleaner to a towel, use minimal moisture, and work in small sections.
If the headliner is loose, sagging, torn, or made from delicate material, skip the drill. A hand-cleaning method or professional repair is less likely to turn a small stain into an expensive headliner replacement.
The safest next step is to vacuum the roof, test the cleaner in a hidden area, and clean one small section before deciding whether the drill is suitable.