How To Clean Headliner Without Damaging It: Safe Guide
A car headliner is the fabric-covered panel attached to the roof inside your vehicle. In the United States, most headliners use a thin fabric bonded to foam and a rigid backing board. That layered design makes the headliner soft and quiet, but it also makes it easy to stain, soak, or loosen.
The safest way to clean a headliner is to use very little moisture, gentle pressure, and a mild cleaner. Start by vacuuming loose dust. Then test a hidden area, lightly mist a microfiber cloth rather than the roof, and blot the stain. Never soak, scrub hard, or use a steam cleaner unless the vehicle maker specifically approves it.
Why Headliners Are Easy to Damage
A headliner is not like a removable carpet. It usually has three main layers:
- A visible cloth, vinyl, or knit surface
- A thin foam layer
- A stiff backing board fixed to the roof
The fabric is often attached with adhesive. Too much water can reach the foam or backing board. Heat, strong chemicals, and hard scrubbing can also weaken the glue.
Common damage includes:
- Sagging fabric
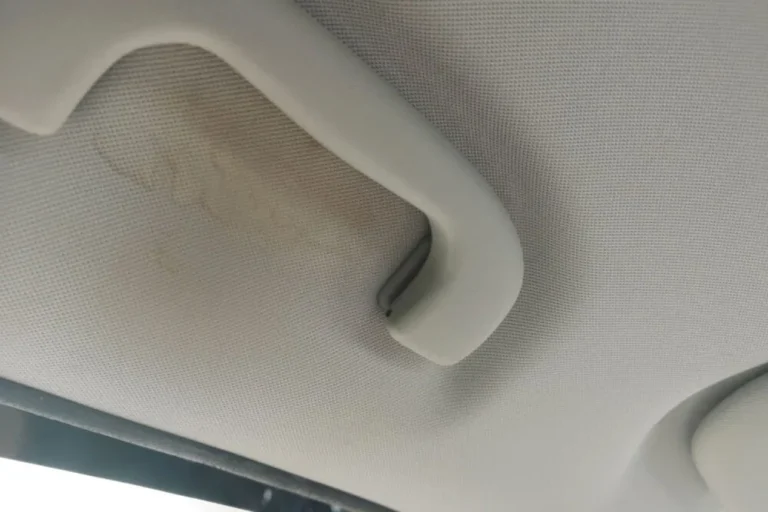
- Water rings
- Loose edges
- Dark scrub marks
- Foam breakdown
- Wrinkles or raised spots
- A permanent change in the fabric’s texture
Headliners also collect dust, smoke residue, skin oil, food odor, and marks from hands or cargo. A light clean can remove surface soil. Deep stains may need a professional trim shop, especially when the fabric has already separated from the board.
Your vehicle owner’s manual should come first. Some manuals give specific cleaning instructions or warn against certain cleaners. If the manual says not to use a chemical on the roof trim, follow that instruction.
What You Need Before Cleaning a Headliner
Gather the following supplies:
- A vacuum with a soft brush attachment
- Two or three clean microfiber cloths
- A small bowl of warm water
- A mild interior cleaner or fabric-safe cleaner
- A soft, clean detailing brush
- A dry towel
- Painter’s tape for protecting nearby trim, if needed
- A small fan, if the weather is damp
Use a white or light-colored cloth when possible. It helps you see dirt transfer and reduces the risk of dye bleeding onto the headliner.
Avoid these products and tools:
- Bleach
- Ammonia
- Acetone
- Nail polish remover
- Strong degreasers
- Glass cleaner
- Household carpet shampoo
- Abrasive sponges
- Stiff brushes
- Hair dryers or heat guns
- Steam cleaners
- Large amounts of water
Do not mix cleaning chemicals. Mixing products can create harmful fumes or damage the fabric.
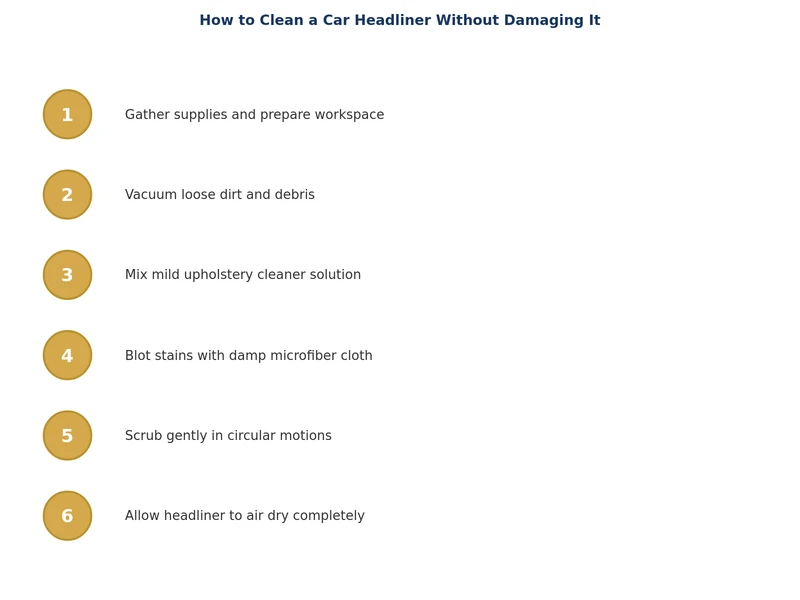
How to Clean a Headliner Step by Step
Follow this process for most small stains and general dirt. Work in a shaded, well-ventilated place. Moderate temperatures are best. Extreme heat can make adhesives softer, while cold can slow drying.
1. Read the vehicle manual
Check the interior-care section before you apply any product. Look for instructions about roof trim, fabric, upholstery, and cleaning chemicals.
If the headliner contains an integrated microphone, sensor, reading light, or other electronic part, keep liquid away from it. Do not spray near openings.
2. Remove loose items
Take out sunglasses, clips, papers, and other items that may fall while you clean. Open the doors or windows if weather and security allow.
Cover nearby areas if the stain is close to:
- A window frame
- A seat
- A sun visor
- An electronic control
- A speaker
- An airbag marking
Use painter’s tape only on clean, dry trim. Remove it slowly when the job is done.
3. Vacuum the surface gently
Use a soft brush attachment. Keep the vacuum nozzle just above the fabric, or touch it with very light pressure.
Move in straight, gentle passes. Do not press the nozzle into the headliner. Heavy pressure can stretch the cloth or create a shiny patch.
This step removes dust and grit before wet cleaning. It also prevents loose particles from turning into muddy streaks.
4. Test the cleaner in a hidden spot
Choose a hidden area, such as the edge near a sun visor or the back edge of the headliner. Apply a small amount of diluted cleaner to a cloth, not directly to the headliner.
Wait until the test area dries. Check for:
- Color change
- Bleeding
- Stiffness
- A visible ring
- Loose fabric
- A new texture or shine
Do not continue if the test causes damage. Try plain water on a clean cloth, use a different fabric-safe product, or contact a professional.
5. Make a weak cleaning solution
If the product label allows it, dilute the cleaner with water. Follow the label ratio. Do not make the solution stronger because the stain looks difficult.
For light soil, warm water on a microfiber cloth may be enough. A mild fabric cleaner is more suitable for greasy marks, smoke residue, or food stains.
The cloth should be damp, not wet. If water drips when you squeeze it, it is too wet.
6. Apply the cleaner to the cloth
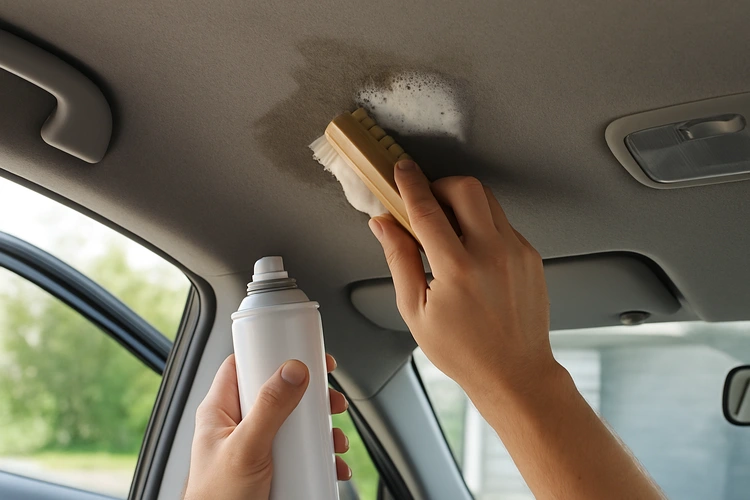
Lightly mist the cleaner onto the microfiber cloth. Never spray the roof directly.
Direct spraying can force liquid into:
- The foam backing
- The adhesive
- Roof wiring
- Interior lights
- Sensors
- Airbag areas
Fold the cloth into a small pad. This gives you a clean surface and helps control the amount of moisture.
7. Blot the stain
Press the damp cloth against the mark with light pressure. Lift the cloth, move to a clean area, and repeat.
Do not rub in circles. Circular rubbing can spread the stain and create a darker or shinier area.
For a greasy spot, several light passes are safer than one wet pass. Stop if the fabric begins to look loose, fuzzy, or darker around the stain.
8. Brush only when needed
If dirt remains in the fabric weave, use a soft detailing brush. Make one or two light strokes in the direction of the fabric.
Do not brush hard. A headliner is usually less durable than a seat or floor carpet.
If the mark does not improve after gentle cleaning, stop. Repeated effort can cause more damage than the original stain.
9. Remove cleaner residue
Use a second microfiber cloth that is barely damp with clean water. Blot the area once or twice to pick up residue.
Do not rinse the headliner with water. The goal is to remove surface residue without wetting the backing.
10. Dry the headliner
Press a dry microfiber towel against the cleaned spot. Then leave the doors or windows open for ventilation when safe.
Let the headliner dry fully before judging the result. A damp area may look darker than the surrounding fabric.
Do not use a heat gun, hair dryer, or direct high heat. Heat may soften the adhesive or shrink the fabric.
How Much Cleaner and Water Should You Use?
Use the smallest amount that can do the job. There is no universal safe volume because headliner fabric, adhesive, stain type, and vehicle design vary.
A useful rule is:
If the headliner feels wet beyond the surface, you used too much liquid.
The cloth should leave a light, even touch. It should not create a broad wet patch.
| Cleaning need | Best first step | Moisture level |
|---|---|---|
| Loose dust | Soft vacuum brush | None |
| Small fresh mark | Blot with a damp cloth | Very low |
| Greasy spot | Diluted fabric cleaner on cloth | Low |
| Smoke film | Several light passes | Low |
| Large water stain | Professional assessment if it remains | Avoid soaking |
| Sagging fabric | Repair or replacement | Do not wet |
A broad stain can tempt you to clean the whole roof. That may create an uneven color difference. If you must clean a larger area, use light, even passes from seam to seam. Keep the surface only slightly damp.
How to Remove Common Headliner Stains
Different stains need different levels of care. The safest method is always to begin with dry removal and a small test.
Food and drink stains
Remove solid food with a blunt edge, such as a plastic card. Do not scrape with a knife.
Blot the remaining mark with a barely damp cloth. Use a mild fabric cleaner only if plain water does not work.
Sugar-based drinks may leave a sticky film. After cleaning, use a second cloth dampened with clean water to lift residue. Do not flood the area.
Grease and oily marks
Grease often comes from hands, hair products, or cargo. Use a small amount of mild fabric cleaner on a cloth.
Blot from the outer edge toward the center. This helps reduce spreading.
Avoid strong degreasers. They may remove color, weaken adhesive, or leave a pale patch.
Smoke and tobacco odor
Smoke residue can cover a large area. Spot cleaning may remove visible soil but may not remove odor from the foam layer.
Use good ventilation first. Clean small areas with a low-moisture method. If the odor remains, professional interior cleaning may be safer than repeated wet cleaning.
Do not spray fragrance onto the headliner. Fragrance can add oil and may only cover the smell for a short time.
Makeup and skin oil
Use a clean, damp microfiber cloth first. If the mark remains, use a mild fabric cleaner that passes your hidden-spot test.
Change to a clean part of the cloth often. A dirty cloth can spread oil across the roof.
Ink
Ink can spread quickly. Do not scrub it or apply a large amount of liquid.
Blot the edge of the mark with a clean cloth. Solvents such as alcohol may damage the fabric or adhesive, so use them only if the vehicle maker or cleaner label specifically supports that use and your test area remains unchanged.
Water rings
Water rings are often caused by uneven drying. Cleaning only the center may make the ring more visible.
If the fabric is still firmly attached, lightly clean the full affected section from seam to seam. Use minimal moisture and dry it evenly.
If the ring came from a roof leak, repair the leak first. Otherwise, the stain may return.
What to Do If the Headliner Starts Sagging
Stop cleaning if the fabric begins to sag, wrinkle, bubble, or separate. More moisture can make the problem worse.
Sagging usually means the adhesive or foam backing has failed. Cleaning will not restore the bond.
Temporary pins, glue, and staples can leave visible marks or interfere with trim and safety systems. A professional automotive upholstery shop can often remove the headliner board, replace the fabric, and reinstall it correctly.
Seek professional help when:
- The fabric is loose over a large area
- Foam is falling from the back of the cloth
- The headliner is near a side-curtain airbag
- Water has entered through the roof
- Mold or a strong odor remains
- A chemical caused discoloration
- The stain covers most of the roof
Do not remove roof trim or airbag covers unless you understand the vehicle’s service procedure. Side-curtain airbag areas require special care.
Common Headliner Cleaning Mistakes
The most common mistake is treating the headliner like carpet. Carpet can hold more water and withstand more agitation. A headliner usually cannot.
Avoid these errors:
- Spraying cleaner directly overhead
- Soaking the fabric
- Scrubbing with a stiff brush
- Using a household carpet machine
- Using steam without manufacturer approval
- Drying with strong heat
- Cleaning without a hidden-area test
- Using a colored towel that can bleed dye
- Cleaning around electronic parts with a wet cloth
- Repeating a failed method several times
- Ignoring a roof leak or condensation source
A clean headliner should look even and feel dry. It should not feel crunchy, loose, sticky, or damp.
When Should You Hire a Professional?
Professional cleaning is the safer choice when the stain is large, old, oily, or connected to water damage. It is also wise when the headliner is already loose.
A professional detailer or automotive upholstery shop should be able to explain:
- Which cleaning method they plan to use
- How they will protect electronics and trim
- Whether they will use low moisture
- How they will handle sagging fabric
- Whether a roof leak must be fixed first
Ask whether the person has worked on headliners before. A service designed for seats or carpets may use too much water or pressure for roof fabric.
The cost of professional care varies by vehicle, location, stain type, and damage. The key trade-off is simple: a small cleaning fee may be less costly than replacing a damaged headliner board.
Quick Decision Guide
Use this guide before you start:
- Dust only: Vacuum with a soft brush.
- Small fresh stain: Blot with a barely damp microfiber cloth.
- Grease or smoke film: Use a tested, diluted fabric cleaner.
- Large stain: Clean lightly from seam to seam or seek professional help.
- Water damage: Fix the leak before cleaning.
- Sagging fabric: Do not wet it; arrange an upholstery repair.
- Unknown fabric or treatment: Read the vehicle manual and test first.
- Stain near electronics or an airbag: Use extra caution and consider professional service.
Frequently Asked Questions
Can I use dish soap to clean a car headliner?
Dish soap is not the best first choice. It can leave residue and may be too strong for some headliner fabrics or adhesives. Use plain water for light soil or a mild fabric cleaner that passes a hidden-area test.
Can I use vinegar on a headliner?
Vinegar may change the smell, color, or finish of some interior materials. Vehicle makers do not universally approve it for headliners. Avoid it unless your vehicle-care instructions specifically support it.
Can I use a steam cleaner on a headliner?
Steam can add heat and moisture. Both may weaken the adhesive or loosen the fabric. Do not use steam unless the vehicle maker or a qualified professional confirms that the method is suitable for that headliner.
How do I get a bad smell out of a headliner?
Begin with ventilation and low-moisture cleaning. If the smell remains, it may be inside the foam backing or caused by mold, smoke, or water intrusion. A professional detailer can assess the source without saturating the roof.
Why does my headliner look worse after cleaning?
The area may still be damp, or the cleaner may have left a ring. Let it dry fully before judging it. If the fabric is discolored, stiff, fuzzy, or loose, stop using more product and ask an automotive upholstery professional for advice.
How often should I clean my headliner?
Clean it only when it is visibly dirty or has an odor. Regular gentle vacuuming is safer than frequent wet cleaning. Avoid cleaning on a fixed schedule if the roof looks clean.
Final Recommendation
To clean a car headliner without damaging it, vacuum gently, test the product, apply cleaner to a cloth, and blot with very little moisture. Work in small areas and stop if the fabric changes, loosens, or becomes wet through.
For sagging fabric, roof leaks, large stains, mold, or damage near airbags and electronics, skip DIY cleaning and contact a qualified automotive detailer or upholstery shop.