How To Clean Car Interior With Home Products: Easy Guide
A clean car interior does not require a large set of specialty products. In most U.S. vehicles, you can remove dust, crumbs, stains, odors, and light grime with a vacuum, microfiber cloths, mild soap, water, and a few tools already found at home. The safest method depends on the surface: plastic, cloth, vinyl, leather, glass, and electronic screens need different care.
This guide explains how to clean a car interior with home products without soaking upholstery, damaging leather, or leaving residue on dashboards and touchscreens. It also covers road salt, pet hair, food stains, smoke odors, and common cleaning mistakes.

What You Need Before Cleaning Your Car Interior
Gather your supplies before you start. A small set of basic tools is enough for most routine cleaning jobs.
Basic supplies
- Household vacuum with a crevice tool
- Soft microfiber cloths
- Soft-bristle brush or clean toothbrush
- Bucket
- Warm water
- Mild, unscented dish soap
- Spray bottle
- Paper towels for glass only
- Cotton swabs
- Old toothbrush
- Soft sponge
- Baking soda
- White vinegar, used only for selected odor tasks
- Plastic scraper or old gift card
- Rubber gloves
- Trash bag
Use clean cloths for different jobs. A cloth used on a greasy door panel should not be used on the windshield or touchscreen.
Make a simple cleaning solution
For hard plastic, vinyl, and rubber surfaces, mix:
- 2 cups of warm water
- 1 teaspoon of mild dish soap
Put the mixture in a bowl or spray it onto a cloth. Do not heavily spray the car interior. A damp cloth gives you better control and lowers the risk of liquid reaching switches, vents, speakers, or wiring.
For glass, plain water may remove light dust. For oily film, use a small amount of household glass cleaner on a cloth. Never spray cleaner directly onto a touchscreen or instrument panel.
Before you begin
Park the car in a shaded, ventilated place. Cleaning in direct sun can make water and soap dry too fast, which may leave streaks or spots.
Remove child seats, floor mats, trash, and personal items. Check under the seats and around the center console. If the vehicle has removable cargo panels, take them out when practical.
Read the vehicle owner's manual before cleaning leather, suede-like upholstery, heated seats, ventilated seats, or a special dashboard finish. The manual is the best source for material-specific limits.

How to Clean a Car Interior Step by Step
The best order is remove trash, vacuum, clean from top to bottom, treat stains, and dry every surface. This prevents dust and crumbs from settling on areas you already cleaned.
1. Remove trash and loose items
Take out bottles, wrappers, receipts, toys, floor mats, and other items. Open the doors and trunk so you can see dirt in corners.
Check the glove box, center console, seat pockets, cup holders, and door bins. These areas often hold sticky residue and crumbs.
Do not throw away important items without checking them. Small objects such as keys, cards, coins, and charging adapters can hide under seats.
2. Vacuum before using water
Vacuum the seats, carpets, floor mats, trunk, dashboard, and door pockets. Use the crevice tool along:
- Seat rails
- The gap between the seat and center console
– Carpet edges - Cup holders
- Door tracks
- Trunk seams
- The area below the pedals
Use a soft brush attachment on the dashboard, air vents, speaker grilles, and instrument cluster. Hold the brush lightly against the surface. A hard nozzle can scratch soft plastic.
For pet hair, vacuum slowly in more than one direction. A slightly damp rubber glove can help gather hair from fabric. Do not wet the upholstery before removing loose dirt. Water can turn dust into mud and push it deeper into the fabric.
3. Clean floor mats
Remove the mats from the vehicle before washing them.
Rubber or all-weather mats
- Shake off loose dirt outside.
- Rinse with a hose or wipe with warm soapy water.
- Scrub grooves with a soft brush.
- Rinse away soap.
- Dry the mats fully before replacing them.
Do not place wet mats in the car. Moisture can create a musty odor and may fog the windows.
Carpet mats
- Vacuum both sides.
- Spot-clean stains with mild soapy water.
- Blot with a clean cloth.
- Avoid soaking the backing.
- Let the mats dry completely.
If the mat has salt marks from winter driving, use a small amount of warm water and mild soap first. Some salt residue may need more than one pass. Blot rather than rub hard, since rubbing can spread the mark.
4. Wipe the dashboard and hard surfaces
Use a microfiber cloth dampened with the mild soap solution. Wipe the dashboard, steering wheel, door panels, center console, cup holders, and trim.
Follow with a second cloth dampened with plain water. This removes soap residue. Dry the surface with a clean microfiber cloth.
Avoid household furniture polish, oily dressings, and products that leave a shiny film. They can make the steering wheel, pedals, and gear selector slippery. A glossy dashboard may also reflect more light into the windshield.
For textured plastic, use a soft toothbrush to work dirt out of grooves. Use gentle pressure around buttons and seams.
5. Clean air vents and small gaps
Use a dry soft brush to loosen dust from vents. Hold the vacuum nozzle near the vent while brushing so the dust is captured.
For narrow gaps, wrap a microfiber cloth around an old gift card. Slide it gently into the gap between trim panels. Do not force the card into a seam or use it near an air-bag cover.
Avoid spraying liquid into vents. Moisture can reach electrical parts and may create an odor inside the ventilation system.
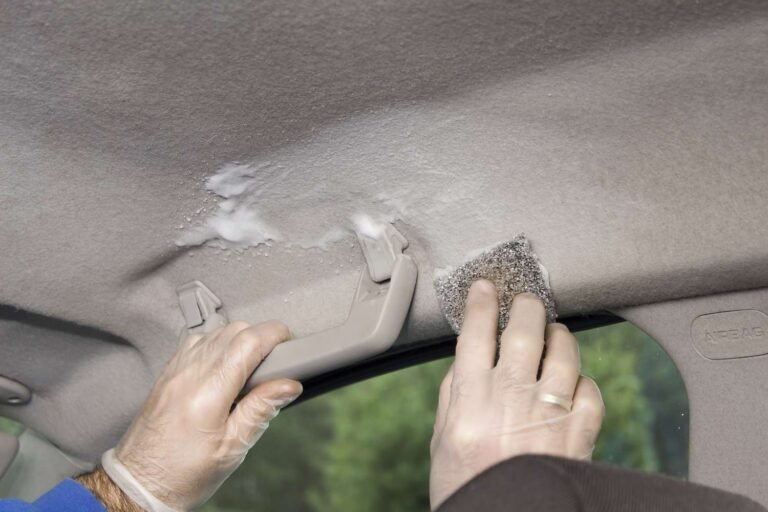
6. Clean cloth seats and fabric upholstery
Fabric seats need controlled moisture. Too much water can soak the foam beneath the fabric and cause slow drying or odor.
- Vacuum the seat thoroughly.
- Test the cleaning mix on a hidden area.
- Apply a small amount of diluted soap to a cloth, not directly to the seat.
- Blot the stain from the outside toward the center.
- Use a soft brush only when needed.
- Wipe with a clean, slightly damp cloth.
- Press a dry towel over the area.
- Leave the doors open or windows cracked until the seat is fully dry.
Avoid aggressive scrubbing. It can push stains deeper, roughen fabric, or create a lighter patch.
For fresh liquid spills, blot at once with a dry towel. Do not rub. For grease, first lift excess oil with a dry cloth. A small amount of mild dish soap may help break down the residue, but test the fabric first.
7. Clean vinyl and synthetic leather
Vinyl and synthetic leather are usually less absorbent than cloth, but seams still need care.
Use a damp microfiber cloth with diluted mild soap. Wipe in small sections, then remove residue with a clean damp cloth. Dry the surface right away.
Use a soft toothbrush around stitching and perforations. Do not flood perforated seats. Liquid may pass through the holes and reach the seat cushion or electrical components.
Do not use acetone, nail-polish remover, strong solvents, or abrasive powders. These can remove color or damage the protective surface.
8. Clean genuine leather carefully
Genuine leather requires more caution than plastic or vinyl.
Start by vacuuming with a soft brush. Then wipe the leather with a barely damp microfiber cloth. If needed, use a leather cleaner that the vehicle manufacturer allows. Home soap mixtures can strip natural oils or leave residue, so they are not the best routine choice for valuable or lightly colored leather.
Never use vinegar, alcohol, bleach, or undiluted dish soap on leather. Do not saturate the seat or allow water to collect in seams and perforations.
After cleaning, let the leather dry naturally away from strong heat and direct sunlight. Use a leather conditioner only if the owner's manual or leather-care instructions permit it. Excess conditioner can make the surface greasy and may transfer to clothing.
9. Clean windows and mirrors
Clean interior glass after dusting the dashboard. Otherwise, dust may settle on the glass again.
- Use a dry microfiber cloth to remove loose dust.
- Put glass cleaner on a cloth.
- Wipe the glass in overlapping strokes.
- Use a second dry cloth to remove streaks.
- Check the glass from different angles.
For a light film, distilled water can reduce mineral spotting. Do not use vinegar-based mixtures near leather, screens, or sensitive trim.
Clean the windshield from the passenger side first if the steering wheel blocks part of the driver's side. A clean windshield can improve visibility, especially when headlights create glare at night.
10. Clean touchscreens and electronic displays
Use the vehicle owner's manual first. Many automakers advise a dry microfiber cloth or a cloth lightly dampened with water.
Turn the screen off if the vehicle allows it. Wipe gently without pressing hard. Do not spray cleaner onto the screen, use paper towels, or apply alcohol unless the manufacturer specifically allows it.
Avoid household glass cleaner on touchscreens. Some formulas contain chemicals that can damage coatings or leave a cloudy film.
Clean physical buttons with a dry or barely damp cotton swab. Keep liquid away from seams, ports, speakers, and control openings.
11. Treat odors after removing the source
Odor removal works best when you remove the material causing the smell.
Check for:
- Spilled drinks
- Damp floor mats
- Food under seats
- Wet clothing
- Pet accidents
- Mold or mildew
- Cigarette or vaping residue
- A dirty cabin air filter
For a mild odor in dry fabric, sprinkle a thin layer of baking soda over the area. Leave it for several hours, then vacuum it thoroughly. Do not use baking soda on wet upholstery, and do not leave powder in seat tracks or controls.
A bowl of vinegar may reduce some room odors, but it does not disinfect the entire interior or remove the source of a deep odor. Never mix vinegar with bleach or other cleaners.
If the smell returns after cleaning, the source may be inside the seat foam, carpet padding, ventilation system, or cabin air filter. Persistent mildew odors deserve more investigation rather than repeated surface cleaning.

Which Home Products Are Safe for Each Car Interior Surface?
The safest product depends on the material. “Home product” does not mean “safe for every surface.”
| Interior surface | Usually suitable | Use caution with | Avoid |
|---|---|---|---|
| Hard plastic | Warm water, mild soap, microfiber cloth | Toothbrushes on textured areas | Abrasive powders, strong solvents |
| Vinyl | Diluted mild soap, damp cloth | Heavy scrubbing | Acetone, bleach, alcohol-heavy products |
| Cloth seats | Vacuum, small amount of mild soap solution | Excess water, stiff brushes | Saturation and harsh stain removers |
| Genuine leather | Damp cloth, approved leather cleaner | Home soap mixtures | Vinegar, bleach, alcohol, solvents |
| Rubber mats | Water, mild soap, soft brush | Strong pressure near edges | Oily dressings on driving surfaces |
| Glass | Water, glass cleaner on cloth | Vinegar near sensitive trim | Spraying near electronics |
| Touchscreens | Dry or barely damp microfiber cloth | Manufacturer-approved cleaner | Paper towels, abrasive cleaners |
| Seat belts | Water and mild soap, applied lightly | Pulling or soaking the belt | Bleach, solvents, machine washing |
The main rule is simple: use the mildest cleaner that can do the job, apply it to the cloth, and use as little moisture as possible.

How to Remove Common Car Interior Stains
Treat a stain based on what caused it. A fresh stain is usually easier to remove than an old one.
Coffee and soft drinks
Blot the spill with a dry towel. Then use a cloth dampened with mild soapy water. Work from the outside toward the center and repeat with a clean damp cloth.
Sugary drinks leave a sticky film. Continue wiping until the surface no longer feels tacky. Dry the area well.
Grease and food oil
Lift solid food with a plastic scraper or spoon. Blot liquid oil with a dry towel. Use a small amount of diluted dish soap on a cloth, then rinse the area with a clean damp cloth.
Do not spread the stain by rubbing in circles. Use short, controlled strokes.
Ink
Ink can spread quickly. Do not begin with water alone. Test any cleaner on a hidden area first, and consider using a fabric or leather product approved for that material.
Alcohol can damage vinyl, leather finishes, and some dyes. If the ink is on a visible leather or delicate surface, professional cleaning is safer than experimenting with household chemicals.
Mud
Let mud dry if possible. Vacuum or brush away the loose material, then clean the remaining mark with a small amount of mild soapy water.
Trying to wipe wet mud can force soil deeper into fabric.
Road salt
Road salt is common in many U.S. states during winter. Vacuum the area first, then blot with warm water and mild soap. Use a clean damp cloth to lift residue and dry the carpet fully.
Repeat as needed rather than soaking the carpet. If salt reaches the carpet padding, a professional extractor may be needed.
Pet accidents
Blot fresh moisture immediately. Remove solid material, then clean the surface based on its material. An enzyme cleaner made for pet stains may work better than a general household mixture, but check that it is safe for the upholstery.
If the odor remains, the liquid may have reached the padding. Surface cleaning alone may not solve it.
Gum
Harden gum with an ice pack inside a plastic bag. Once firm, gently lift it with a plastic scraper. Avoid metal tools, which can cut fabric or scratch plastic.
Candle wax
Let the wax harden. Lift what you can with a plastic scraper. For fabric, place an absorbent paper towel over the remaining wax and use gentle warmth only if the upholstery maker permits it. Excess heat can melt synthetic fibers or damage trim.

What Not to Use When Cleaning a Car Interior
Some common household products can damage automotive materials or create a safety risk.
Do not use bleach
Bleach can discolor fabric, weaken fibers, damage leather finishes, and create harmful fumes when mixed with other cleaners. It is not a general-purpose car interior cleaner.
Do not mix cleaning chemicals
Never mix bleach with vinegar, ammonia, or other cleaners. Dangerous gases can form. Use one product at a time and follow the product label.
Avoid ammonia on sensitive surfaces
Ammonia-based glass cleaners may damage window tint, coatings, plastics, or nearby trim. Apply glass cleaner to a cloth instead of spraying it into the vehicle.
Avoid oily dashboard products
Oil-based shine products can leave a slippery film on steering wheels, pedals, and control surfaces. They may also increase windshield glare.
Do not soak seats or carpets
Excess water can cause:
- Musty odors
- Slow drying
- Staining
- Mold growth
- Damage to seat sensors
- Corrosion around electrical parts
Use a damp cloth, not a wet interior.
Do not use a household steam cleaner without checking first
Heat and moisture can affect adhesives, screens, leather coatings, seat sensors, and plastic trim. Check the vehicle and tool instructions before using steam.
Do not scrub seat belts aggressively
Seat belts are safety equipment. Clean them gently while fully extended, using mild soap and water. Let them dry before retracting them. Do not use bleach, solvents, or harsh stain removers.
Be cautious around air bags
Do not spray or scrub aggressively over air-bag covers. These areas include steering-wheel covers, dashboard panels, seat sides, and roof pillars. If an air-bag warning light is on, cleaning will not fix the fault. Have the vehicle inspected by a qualified technician.
What to Do If the Car Interior Still Looks or Smells Dirty
If a cleaning attempt fails, do not immediately use a stronger chemical. First identify the likely cause.
| Problem | Likely cause | Safer next step |
|---|---|---|
| White marks return after drying | Soap or salt residue | Wipe with clean water and dry fully |
| Fabric has a dark ring | Too much liquid or uneven drying | Blot, rinse lightly, and dry with airflow |
| Dashboard feels sticky | Cleaner residue or spilled drink | Use a clean damp cloth, then dry |
| Glass stays streaky | Too much product or dirty cloth | Use less cleaner and a fresh glass cloth |
| Odor returns | Source remains in padding or vents | Inspect under seats and check the cabin filter |
| Leather feels greasy | Excess conditioner or oily product | Wipe gently with a clean damp cloth |
| Screen looks cloudy | Wrong cleaner or coating damage | Stop using chemicals and check the manual |
| Stain spreads | Rubbing or too much liquid | Blot from the edge inward and reduce moisture |
A professional detailer may be the right choice for deep stains, smoke contamination, mold, flood damage, bodily fluids, or liquid that has reached seat electronics. Professional help is also wise when a stain covers a large area or the material has started to peel, crack, or lose color.
If the vehicle smells like gasoline, exhaust, burning plastic, or electrical insulation, stop cleaning and have the vehicle checked. Those odors may signal a mechanical or electrical problem.

How Often Should You Clean Your Car Interior?
A light clean every one to two weeks helps prevent buildup. Vacuum high-use areas more often if you carry children, pets, food, or outdoor gear.
A practical schedule is:
- Every few days: Remove trash and wipe spills.
- Weekly or biweekly: Vacuum seats, carpets, mats, and floor areas.
- Monthly: Clean vents, cup holders, door pockets, glass, and seat seams.
- Seasonally: Wash rubber mats, inspect for salt, and check under seats.
- After a spill: Blot and clean the affected area as soon as possible.
Your schedule should reflect how the vehicle is used. A family SUV, work truck, rideshare vehicle, and commuter sedan will not collect the same type or amount of dirt.

Frequently Asked Questions
Can I use dish soap to clean my car interior?
You can use a very small amount of mild dish soap diluted in warm water on many hard plastic, vinyl, rubber, and fabric surfaces. Apply the solution to a cloth, not directly to the interior. Rinse away residue with a clean damp cloth.
Dish soap is not the best routine cleaner for genuine leather. Always test a hidden area first.
Can I use vinegar to clean the inside of my car?
Diluted vinegar may help with some household odors or mineral marks on suitable hard surfaces, but it is not a universal car cleaner. Avoid it on leather, touchscreens, delicate coatings, and surfaces the owner's manual says to clean differently.
Never mix vinegar with bleach or ammonia.
How can I clean a car interior without a vacuum?
Remove mats and shake them outside. Use a soft brush to loosen crumbs, then collect them with a dustpan or cloth. A lint roller can remove hair from fabric, and cotton swabs can reach narrow seams.
A vacuum is still the most effective option for dirt under seats and inside carpet fibers.
How do I remove cigarette smoke smell from a car?
Start by removing ash, trash, and washable fabric items. Clean hard surfaces, wash or replace floor mats, vacuum upholstery, and check the cabin air filter. Smoke odor can remain in headliners, seat foam, carpet padding, and ventilation ducts.
If repeated cleaning does not remove the smell, professional odor treatment may be needed. Do not mask it with heavy fragrance.
Can I clean car seats with hydrogen peroxide?
Hydrogen peroxide may bleach or discolor fabric, leather, vinyl, and trim. It can also damage dyes and finishes. Avoid using it unless the vehicle material maker and the product label specifically support that use.
Choose a cleaner made for the exact upholstery type when a mild soap solution is not enough.
How do I clean a child car seat?
Follow the child-seat manufacturer's manual. Many covers can be removed and washed, but harness straps often must not be soaked, bleached, machine-washed, or treated with harsh chemicals. Do not use a cleaner that could weaken the harness.
A child car seat is safety equipment, so the manual takes priority over general car-cleaning advice.

Key Takeaways
- Vacuum before using water or soap.
- Use mild soap diluted in warm water for many hard surfaces.
- Apply cleaner to a cloth instead of spraying the dashboard, screen, or vents.
- Use separate methods for cloth, vinyl, genuine leather, glass, and electronics.
- Blot stains instead of rubbing them deeper into fabric.
- Keep water away from switches, screens, speakers, seat electronics, and air-bag areas.
- Avoid bleach, harsh solvents, oily dressings, and chemical mixtures.
- Dry mats, seats, carpets, and belts completely before using the vehicle.
- Check the owner's manual when the material or safety system is uncertain.
Conclusion
The safest way to clean a car interior with home products is to use simple tools, mild solutions, controlled moisture, and the right method for each surface. Start with vacuuming, clean from top to bottom, treat stains gently, and dry every area well.
When a stain reaches foam or carpet padding, an odor returns, or electronics and safety equipment may be involved, stronger household chemicals are not the answer. Stop, check the owner's manual, or use a qualified automotive detailer.