How To Deep Clean Car Headliner: Easy Step-By-Step Guide
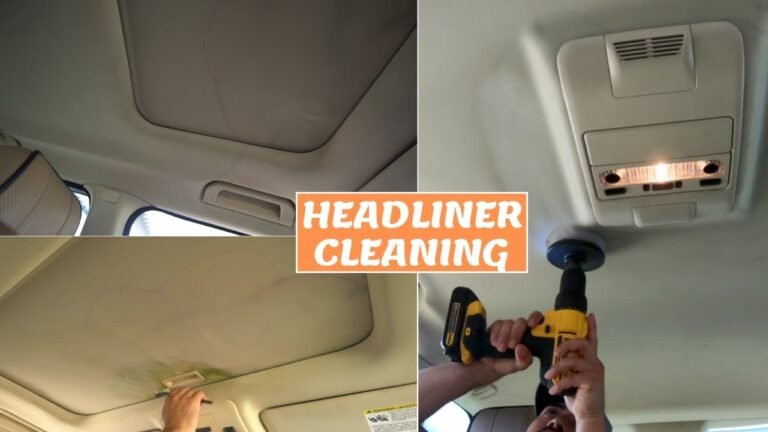
A car headliner is the fabric-covered panel attached to the vehicle’s roof. To deep clean it, first vacuum loose dirt, then treat stains with a small amount of suitable cleaner on a microfiber cloth or soft brush. Work in small areas, avoid soaking the fabric, blot instead of scrubbing, and dry the headliner quickly with the doors open.
This method works for most cars, trucks, and SUVs sold in the United States. However, always check the owner’s manual first. Some headliners include microphones, sensors, lights, wiring, or delicate trim that needs extra care.
Why Car Headliners Need Gentle Cleaning
A headliner is not just a piece of cloth. Most modern headliners use a thin fabric bonded to foam and a firm backing board. Too much water, heat, or force can weaken the adhesive and cause the fabric to sag.
Common signs of a dirty headliner include:
- Gray or brown marks near door openings
- Fingerprints around grab handles
- Grease near the sun visors
- Dust around the dome light
- Smoke or food odors
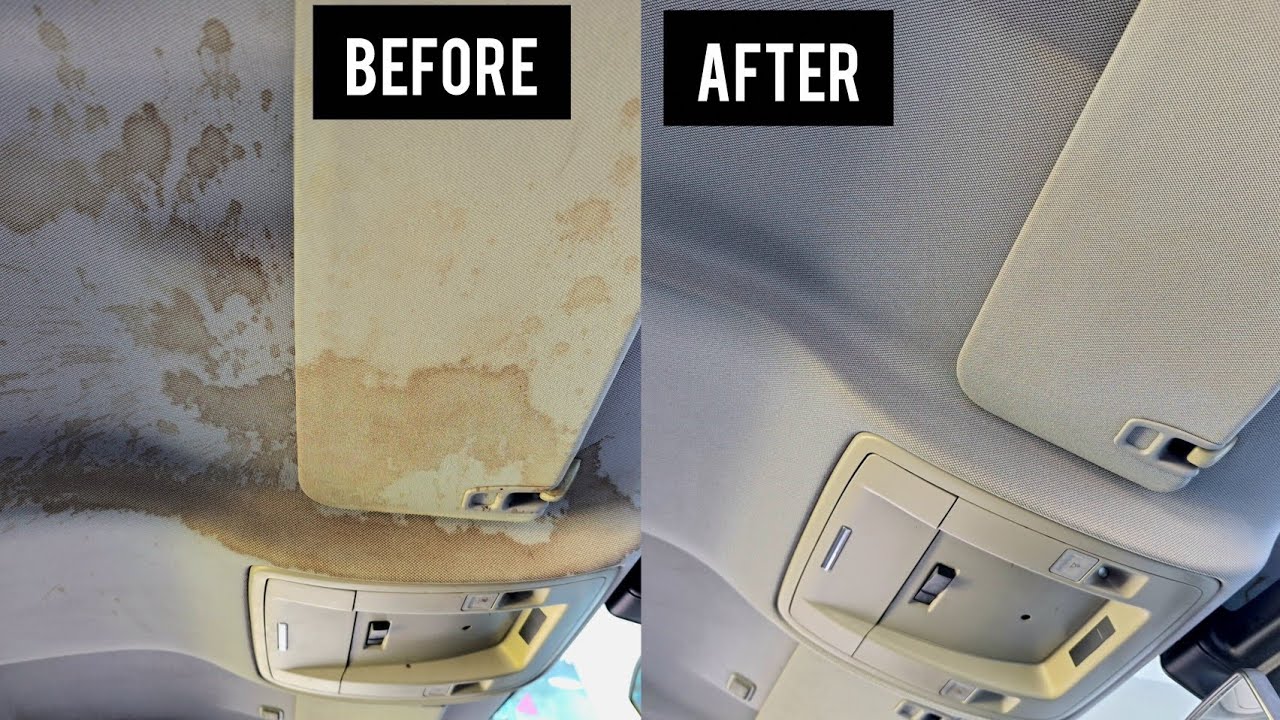
- Water marks from a roof or sunroof leak
- Dark spots from dirty hands or hair products
The fabric may look strong, but it can separate from the foam beneath it. Once the adhesive fails, cleaning alone will not restore the headliner. The fabric may need professional repair or replacement.
What You Need Before Cleaning
Gather the tools before you begin. A good setup helps you use less moisture and reduces the risk of damage.
Recommended supplies
- Vacuum with a soft brush attachment
- Two or three clean microfiber cloths
- Soft upholstery brush or clean detailing brush
- Mild automotive upholstery cleaner
- Distilled water
- Small spray bottle
- Cotton swabs for tight spaces
- Soft towel for drying
- Painter’s tape or plastic film to protect nearby trim
- Nitrile gloves
Use an automotive upholstery cleaner only if its label says it is suitable for fabric surfaces. A mild fabric cleaner may work, but strong household products can leave a residue or affect the adhesive.
Products to avoid
Do not use these products on a car headliner unless the vehicle maker specifically allows them:
- Bleach
- Ammonia-based glass cleaner
- Strong degreasers
- Carpet shampoo applied heavily
- Abrasive powders
- Solvent-based cleaners
- Undiluted dish soap
- High-pressure steam
- Garden hoses or extraction machines
Avoid spraying any liquid near dome lights, microphones, airbag covers, sunroof controls, or electronic sensors.
Test first
Find a hidden area, such as the edge behind a sun visor. Apply a small amount of cleaner to a cloth, not directly to the headliner. Dab the test area and let it dry.
Check for:
- Color transfer
- Fabric shrinking
- Stiffness
- Water marks
- Adhesive separation
- Change in texture
If the test area changes, stop and use a professional detailer or a product approved by the vehicle manufacturer.

How to Deep Clean a Car Headliner Step by Step
The safest deep-cleaning method uses low moisture and light pressure. Do not try to clean the entire roof with a wet brush or saturated towel.
1. Park in a shaded, dry place
Park the vehicle under a roof or in shade. The headliner should not be hot to the touch. Heat can make some stains spread and may speed up adhesive failure when moisture is added.
Open the doors or windows during the drying process. Do not clean during rain or when high humidity will prevent the fabric from drying.
2. Remove loose items from the cabin
Take out floor mats, child seats, papers, and other items. Cover the dashboard and front seats if you plan to use a spray bottle nearby.
Use painter’s tape or a towel to protect:
- Plastic trim
- Seat belt anchors
- Sunroof controls
- Dome lights
- Rearview mirror mounts
- Speaker grilles
If the headliner is wet from a leak, fix the leak before cleaning. Otherwise, new water marks may return.
3. Vacuum the headliner
Set the vacuum to a low or moderate setting. Use a soft brush attachment and move it in one direction with light pressure.
Start at the front and work toward the rear. Pay attention to:
- Roof seams
- Grab handles
- Sun visors
- Dome lights
- Edges near the doors
- The area above the rear seats
Do not press the vacuum nozzle directly against the fabric. A strong vacuum can pull at loose fibers or lift weak fabric from the backing.
4. Remove dry surface marks
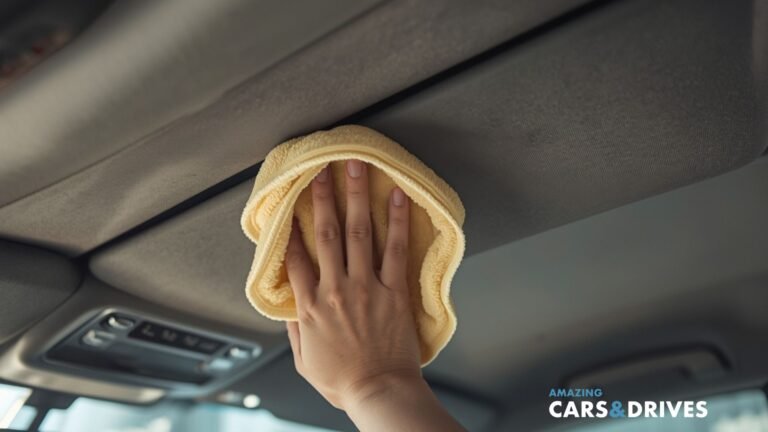
Some marks are loose dust or dried debris. Try a clean, dry microfiber cloth first. Wipe gently in one direction.
For a small dried spot, use a soft upholstery brush with short, light strokes. Stop if the fabric begins to fuzz or change shape.
5. Prepare a low-moisture cleaner
For a mild cleaner, mix a small amount of approved upholstery cleaner according to its label. If the product does not provide a mixing ratio, do not guess with a strong concentration.
Use distilled water in a clean spray bottle when possible. Distilled water can reduce mineral marks, but it does not make an unsuitable cleaner safe.
Spray the solution onto a microfiber cloth until the cloth is damp. It should not drip. Never flood the headliner.
6. Clean one small section at a time
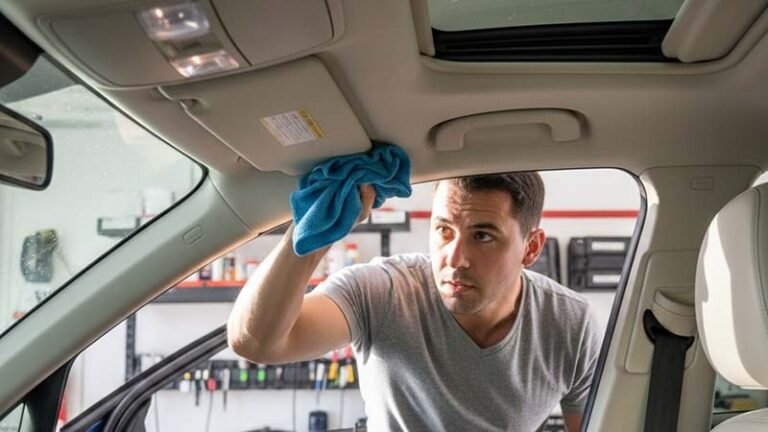
Work on an area about 12 inches by 12 inches. Dab or wipe the fabric gently with the damp cloth.
For a stain, move from the outside toward the center. This can help reduce the chance of spreading the mark. Use only enough pressure to lift the soil.
Do not scrub in circles. Circular scrubbing can create a visible change in the nap, or direction, of the fabric.
7. Use a soft brush only when needed
If a stain remains, apply a small amount of cleaner to a soft brush. Tap or brush the spot lightly.
Use short strokes. Do not push the brush into the headliner. The goal is to loosen surface soil, not to force cleaner into the foam.
For grease near a sun visor, several light treatments are safer than one heavy treatment. Blot between treatments with a dry microfiber cloth.
8. Blot away moisture and soil
Use a clean, dry microfiber towel to blot the treated area. Press lightly, then lift the towel.
Replace the towel when it becomes damp or dirty. A wet, dirty towel can put soil back into the fabric.
9. Clean the full headliner evenly
If you clean only one small spot, the area may look lighter than the rest of the roof. For a broad dirty area, clean the whole headliner in small sections using the same amount of moisture and pressure.
Avoid repeatedly wetting the same section. Once the area looks clean, move on.
10. Dry the headliner completely
Leave the doors or windows open until the headliner is fully dry. A fan placed outside the vehicle can improve air movement. Keep the fan away from water and electrical outlets.
Do not use a heat gun or place a hair dryer close to the fabric. Excess heat can shrink fabric or soften the adhesive.
A clean, dry headliner should feel normal to the touch. It should not feel cool, stiff, damp, or spongy.

How to Remove Common Headliner Stains
Different stains need different levels of care. Always start with the least aggressive method.
| Stain or problem | First method | Main risk |
|---|---|---|
| Dust | Vacuum and dry microfiber cloth | Pulling at loose fibers |
| Fingerprints | Damp microfiber cloth | Leaving a water ring |
| Grease | Mild upholstery cleaner and blotting | Spreading the oil |
| Coffee or soda | Blot, then use approved fabric cleaner | Permanent discoloration |
| Smoke odor | Surface cleaning and full drying | Odor remaining in foam |
| Water mark | Find and repair the leak first | Reappearing stain |
| Mold or mildew | Professional assessment | Spreading contamination |
Fingerprints and light marks
Dampen a microfiber cloth with approved cleaner. Dab the mark, then blot with a dry cloth. Avoid repeated rubbing.
Grease and oily marks
Grease may need more than one light treatment. Apply cleaner to the cloth, not the headliner. Blot from the outside toward the center, and allow the section to dry between attempts.
If the mark remains, stop before the fabric becomes wet. A professional detailer may have safer tools and products.
Coffee, soda, and juice
Blot fresh spills as soon as possible with a dry towel. Do not rub. Then use a small amount of upholstery cleaner on a cloth.
Sugary drinks can leave a sticky residue. Several light passes may be needed, but each pass should use very little moisture.
Smoke odor
Cleaning the visible fabric may not remove smoke odor from the foam, seats, carpet, and air vents. Start with a complete interior cleaning and replace the cabin air filter if the vehicle’s maintenance schedule or condition supports replacement.
Do not use ozone generators inside an occupied vehicle. Ozone can irritate the lungs and may damage some materials. If odor remains, seek a professional odor-treatment service and follow its safety instructions.
Water stains
A water mark usually points to a leak from the sunroof, roof seam, windshield, antenna, or weather seal. Repair the source before cleaning.
If the backing board is warped, the foam has separated, or the headliner stays damp, cleaning will not solve the problem. A body shop or automotive upholstery specialist should inspect it.

How to Clean Around Lights, Sensors, and Airbags
Use extra care around headliner components. Many vehicles have electrical parts and safety equipment mounted near the roof.
Dome lights and microphones
Do not spray around dome lights, reading lights, microphones, or camera units. Put cleaner on a cloth and use a nearly dry corner of the cloth around the trim.
If a light must be removed, follow the vehicle service information. Disconnecting electrical parts without the right procedure can cause damage or warning lights.
Curtain airbag areas
Some vehicles have curtain airbags behind the upper side trim and headliner edges. Do not pull, pry, staple, glue, or heavily wet these areas.
If the headliner is loose near an airbag label or side pillar, stop cleaning and arrange a professional inspection. A loose panel may affect how the trim moves during a crash.
Sunroof openings
Clean the fabric around a sunroof with a barely damp cloth. Do not pour cleaner into the drain channels or frame.
If the roof shows repeated dampness, blocked drains or damaged seals may be involved. A repair is needed before cosmetic cleaning.
When You Should Not Deep Clean the Headliner Yourself
Do not use a DIY wet-cleaning method when the headliner has structural or safety problems.
Seek professional help if:
- The fabric is sagging
- The foam is visible
- Large sections have separated
- The headliner has mold or strong mildew growth
- Water damage is extensive
- The fabric bleeds during a test
- The vehicle has a curtain airbag issue
- The roof liner feels soft or warped
- The stain covers most of the headliner
- A previous cleaner left a large ring or stiff patch
A professional detailer may clean the surface with low-moisture equipment. An automotive upholstery shop can repair or replace a detached headliner. These are different services, so explain whether the problem is dirt, odor, water damage, or fabric separation.

Common Headliner Cleaning Mistakes
The most common mistake is using too much water. Water can soak through the fabric and weaken the adhesive.
Other mistakes include:
- Spraying cleaner directly overhead
- Scrubbing hard with a stiff brush
- Using a steam cleaner close to the fabric
- Cleaning only the center of a visibly dirty roof
- Drying the headliner with strong heat
- Ignoring a roof or sunroof leak
- Using a colored towel that transfers dye
- Skipping the hidden-area test
- Using household bleach or harsh degreaser
- Pulling at a loose edge
- Cleaning around airbags without care
A headliner often looks better when cleaned gently in two or three passes. More product and more pressure do not always produce a better result.

How to Tell Whether the Cleaning Worked
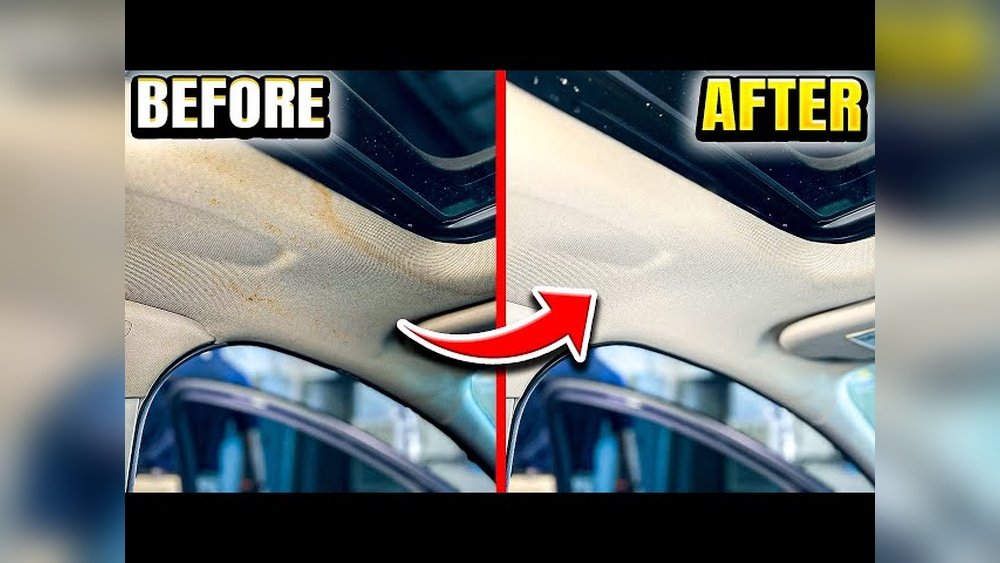
The headliner is properly cleaned when:
- The surface looks even after drying
- The fabric lies flat
- No water rings appear
- The texture feels unchanged
- The treated area is not sticky
- The odor is reduced without a strong chemical smell
- No trim, light, or sensor was exposed to liquid
Inspect the roof again in natural daylight. Some marks appear only after the fabric dries. If a ring appears, do not immediately soak the area again. Let it dry fully, then reassess the entire section.
If the fabric begins to sag during or after cleaning, stop. Further moisture may worsen the separation.
Key Takeaways
- Vacuum first and use very little liquid.
- Apply cleaner to a cloth, not directly to the headliner.
- Treat small sections with light pressure.
- Blot stains instead of scrubbing them.
- Keep moisture away from lights, sensors, and airbag areas.
- Dry the vehicle with good airflow and no strong heat.
- Repair leaks before treating water stains.
- Stop if the fabric sags, bleeds, or separates.
Frequently Asked Questions
Can I use a steam cleaner on a car headliner?
Steam can damage the adhesive that holds the fabric to the backing board. It may also force moisture into the foam. Unless the vehicle maker or a qualified professional specifically approves the method, avoid steam on the headliner.
Can I use dish soap to clean a headliner?
Dish soap is not the best first choice because it can leave residue and may require extra rinsing. If you use it at all, use only a very diluted solution after testing a hidden area. An automotive upholstery cleaner is usually easier to control.
How often should I clean my car headliner?
Vacuum the headliner during normal interior cleaning. Deep clean it only when marks or odors appear. Frequent wet cleaning can add unnecessary stress to the fabric and adhesive.
Why is my headliner sagging after cleaning?
The adhesive or foam may have weakened because of age, heat, moisture, or cleaning pressure. More cleaning will not fix the problem. A vehicle upholstery specialist can determine whether repair or replacement is needed.
How do I remove a water stain from a headliner?
Find and repair the leak first. After the area is dry, test an approved upholstery cleaner and treat the stain lightly. If the backing is warped or the stain returns, have the roof liner inspected.
What should I do if the headliner smells after cleaning?
Allow it to dry fully and improve air circulation. If the odor remains, the source may be in the foam, seats, carpet, vents, or cabin air filter. Persistent smoke or mildew odor may require professional interior and odor treatment.
Final Recommendation
The safest way to deep clean a car headliner is to use a low-moisture process: vacuum gently, test the cleaner, treat small sections, blot the fabric, and dry it with airflow. Avoid soaking, hard scrubbing, steam, and strong chemicals.
Before cleaning, inspect for sagging, water damage, mold, or loose fabric. If any of these problems are present, fix the underlying issue or contact an automotive upholstery professional rather than adding more moisture.