How To Make Car Cleaning Slime With Contact Solution: DIY
Car cleaning slime can lift dust, crumbs, and loose dirt from cup holders, console seams, and other hard-to-reach areas inside a car. In the United States, you can make a simple version with white school glue, baking soda, and contact lens solution that contains boric acid or a borate.
Use this slime only on sealed, hard surfaces. Do not press it into vents, speakers, seat fabric, suede, leather, screens, buttons, or electrical gaps. Homemade slime may leave residue, so test it first in a hidden spot.

What You Need
Gather these items before you start:
- 4 fluid ounces of white school glue
- ½ teaspoon of baking soda
- 1 tablespoon of contact lens solution
- A clean mixing bowl
- A spoon or craft stick
- Disposable gloves
- A clean, dry storage container
- A microfiber cloth
The glue should contain polyvinyl acetate, often called PVA. The contact solution must list boric acid, sodium borate, or another borate compound. Saline solution without a borate may not turn the glue into slime.
Read the product label. “Contact solution” is a broad term, and formulas differ. Do not assume that every saline or multipurpose solution will work.
For a smaller batch, use:
| Ingredient | Smaller batch |
|---|---|
| White school glue | 2 fluid ounces |
| Baking soda | ¼ teaspoon |
| Contact solution | 1½ teaspoons, added slowly |
The smaller batch is useful when you want to test the texture before making more.

How to Make Car Cleaning Slime With Contact Solution
Follow these steps in order. Add the contact solution slowly because too much can make the slime stiff, rubbery, or hard to handle.
-
Pour the glue into a bowl.
Use 4 fluid ounces of white PVA school glue. -
Mix in the baking soda.
Stir for about 30 seconds. Break up any dry pockets. -
Add the contact solution.
Pour in 1 tablespoon and stir until the mixture begins to pull away from the bowl. -
Knead the slime.
Put on disposable gloves and knead it with your hands for two to three minutes. It may feel sticky at first. -
Adjust the texture.
If the slime sticks badly to your gloves, add contact solution in ¼-teaspoon amounts. Knead after each addition. Stop when the slime feels soft but does not leave a wet film on your hands. -
Check the finished texture.
The slime should stretch slowly, hold together, and lift small particles without breaking apart.
Do not add large amounts of contact solution at once. The slime may seem too sticky at first, but kneading often improves the texture without more activator.

How to Use Cleaning Slime in a Car
Before using the slime, remove loose trash and large crumbs by hand. Cleaning slime works best as a final dust pickup tool, not as a replacement for vacuuming.
Use it on surfaces such as:
- Plastic cup holders
- Sealed plastic consoles
- Hard dashboard trim
- Door-handle recesses
- Shallow storage pockets
- Around fixed gear-shift trim
- Flat, nonporous panels
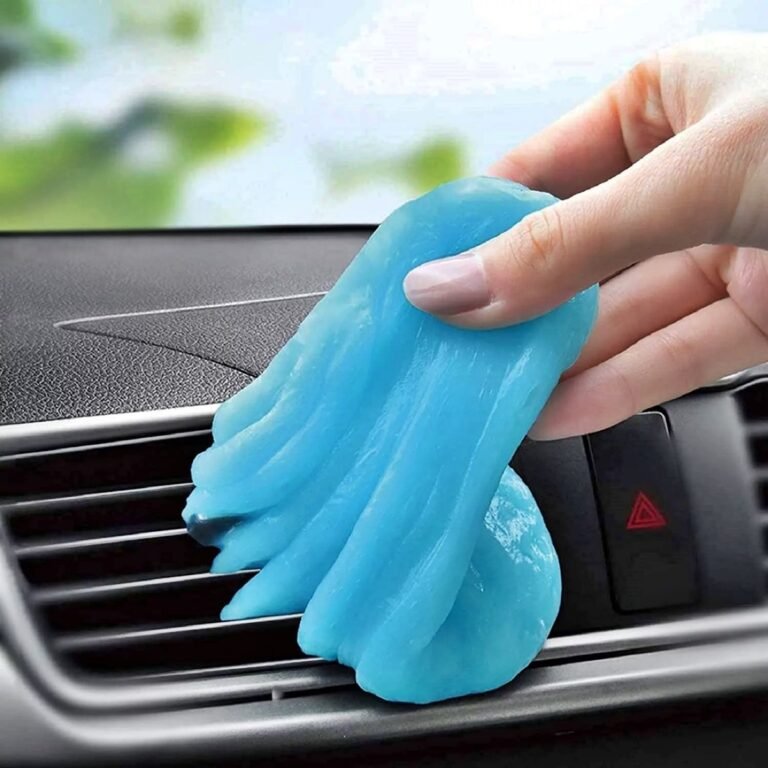
Press the slime down lightly. Lift it straight up rather than rubbing it across the surface. Fold the dirty section inward, expose a clean area, and continue.
Work in small areas. If the slime leaves a shiny, damp, or sticky mark, stop using it and wipe the surface with a slightly damp microfiber cloth. Finish with a dry cloth.
Do not push slime into narrow seams. A piece that breaks off can be difficult to remove from a switch, vent, speaker grille, or trim gap.
Surfaces to Avoid
Keep homemade cleaning slime away from:
- Touchscreens and instrument displays
- Buttons, switches, and control knobs
- Air vents
- Speaker grilles
- Seat belts
- Cloth, carpet, and headliners
- Suede, alcantara, and unfinished leather
- Cracked or peeling vinyl
- Soft rubber seals
- Exposed wiring or charging ports
The main risk is not only chemical residue. Slime can stretch into openings, transfer color, or pull at weak coatings and loose trim.

Safety Rules for Homemade Car Cleaning Slime
Use the slime with care because both the ingredients and the car surfaces can create problems.
Protect Your Skin
Contact solution may contain boric acid or borate compounds. These ingredients help form the slime, but they are not meant to be eaten or spread on the skin as a toy or cleaner.
Wear gloves while mixing and using the slime. Wash your hands after handling it. Keep the mixture away from children, pets, food, and drink containers.
If the mixture gets in your eyes, rinse with clean running water. For exposure concerns, follow the product label and contact Poison Control in the United States at 1-800-222-1222.
Avoid Heat and Direct Sun
Do not leave the slime on a hot dashboard or in a closed car during warm weather. Heat can change its texture and increase the chance of residue.
Store it in a sealed container at room temperature. Throw it away if it develops an unusual odor, changes color, grows mold, or becomes difficult to control.
Test First
Test the slime on a hidden part of the same material. Wait a few minutes, then check for:
- Sticky residue
- Color transfer
- Dull or glossy patches
- Softening
- Peeling
- Changes in texture
A test spot cannot guarantee that every part of the interior will react the same way. Use extra caution on older vehicles and surfaces that already show wear.

Troubleshooting Contact Solution Slime
Small changes in ingredients can produce very different results. Use the table below to identify the likely cause.
| Problem | Likely cause | What to do |
|---|---|---|
| The mixture stays liquid | The contact solution lacks boric acid or borate | Check the label and use a compatible solution |
| The slime is very sticky | It needs more kneading or a little more activator | Knead first, then add ¼ teaspoon of contact solution |
| The slime is hard or rubbery | Too much contact solution | Knead in a few drops of glue to soften it |
| The slime tears apart | It may be overactivated or too dry | Add a small amount of glue and knead |
| The slime leaves a film | The batch is too wet or the surface is unsuitable | Stop use and wipe the area with a damp microfiber cloth |
| The slime has a strong odor | Ingredients may be old or contaminated | Discard it and make a fresh, small batch |
| It does not pick up dust | The surface is greasy or the slime is too firm | Clean grease first and adjust the texture |
Do not keep adding ingredients without measuring. A failed batch is usually easier and safer to discard than to repair.
If the slime fails twice, use a commercial interior detailing gel or a vacuum with a soft brush. Those products are made for cleaning, although you should still follow their labels and test them on delicate surfaces.

How to Clean Up Slime Residue
If slime sticks to a hard, sealed surface, do not scrape it with a metal tool. Scraping can scratch plastic and trim.
Use this method:
- Lift away the large pieces with fresh slime or a plastic card.
- Wipe the area with a clean microfiber cloth.
- Dampen another cloth with plain water.
- Wipe again to remove remaining residue.
- Dry the surface fully.
For stubborn residue, use a small amount of an interior cleaner labeled for that exact surface. Test the cleaner first. Avoid pouring liquid directly onto the car interior.
Do not use household solvents, acetone, gasoline, or strong degreasers unless the vehicle or product manufacturer specifically permits them. These chemicals can damage coatings, dyes, plastics, and synthetic leather.
If slime enters a vent, button gap, or electronic opening, do not push it farther inside. Turn off the vehicle and remove only what you can reach without force. For contamination inside an electronic control, seek help from a qualified automotive detailer or repair professional.

How Long Does Homemade Car Cleaning Slime Last?
A homemade batch may remain usable for several days or longer if you store it in a clean, airtight container. Its useful life depends on the ingredients, handling, heat, and contamination.
Discard the slime when it becomes:
- Watery
- Hard and crumbly
- Slimy in a wet, uncontrolled way
- Discolored
- Smelly
- Covered with visible dirt
- Difficult to remove from itself
Do not mix used slime back into a fresh batch. Dirt, oils, and cleaning chemicals can change the texture and increase the chance of transferring residue.
Make only as much as you can use soon. A small batch reduces waste and limits the time that a borate-containing mixture stays in your car.

Homemade Slime vs. Other Car Interior Cleaning Methods
Cleaning slime is convenient for loose dust in shallow gaps, but it is not the best tool for every job.
| Cleaning method | Best use | Main limitation |
|---|---|---|
| Homemade cleaning slime | Loose dust and crumbs on sealed hard surfaces | Can leave residue or enter gaps |
| Soft detailing brush | Vents, seams, and textured plastic | Moves dirt unless used with a vacuum |
| Vacuum with a soft brush | Crumbs, sand, and loose debris | May not reach very narrow gaps |
| Microfiber cloth | Flat panels and light surface dust | Does not lift debris from deep seams |
| Interior cleaner | Grease and marks approved by the label | Can damage surfaces if misused |
Use a brush and vacuum for vents and deep seams. Use a microfiber cloth for broad panels. Reserve slime for small amounts of loose debris on safe, hard surfaces.
This approach is more controlled than trying to clean the entire interior with slime.

Key Takeaways
- Use white PVA school glue, baking soda, and contact solution with boric acid or borate.
- Add the contact solution slowly and knead the mixture well.
- Test the slime on a hidden area first.
- Use it only on sealed, hard surfaces.
- Keep it away from screens, vents, electronics, fabric, suede, leather, and rubber seals.
- Wipe the surface with a clean, damp microfiber cloth if residue remains.
- Discard the slime when it smells, changes color, or becomes hard to control.
Frequently Asked Questions
Can I make car cleaning slime with saline solution?
Only if the saline contains a borate ingredient that can activate the glue. Plain saline without boric acid or another borate usually will not produce the right texture.
Can I use clear glue instead of white glue?
Yes, clear PVA glue can work, but it may create a different texture. Check that the glue is PVA-based and adjust the contact solution in small amounts.
Is homemade cleaning slime safe for leather car seats?
It is not a good choice for leather. Slime may leave residue in the grain or affect the finish. Use a cleaner made for automotive leather and follow its label.
Can I use this slime on a car touchscreen?
No. Keep it away from touchscreens, displays, buttons, ports, and control gaps. A clean, dry microfiber cloth is a safer first choice for most screens.
What should I do if slime gets into a car vent?
Do not turn the slime deeper into the vent. Remove accessible pieces gently with tweezers or a plastic tool. If the material has moved inside the duct, contact an automotive detailer or repair professional.
Can children use this car cleaning slime?
Children should not use it unsupervised. The mixture may contain borate compounds, and it should not touch the mouth, eyes, food, or drink. Adults should handle mixing, use, storage, and disposal.
Conclusion
You can make car cleaning slime with 4 fluid ounces of white PVA glue, ½ teaspoon of baking soda, and about 1 tablespoon of compatible contact solution. The key is to check the contact solution label, add it slowly, and stop when the slime becomes soft but controlled.
Use the finished slime only on small areas of sealed hard plastic. For fabric, leather, screens, vents, and electronics, choose a method designed for that material instead. A careful test and a light touch will help prevent residue and damage.